


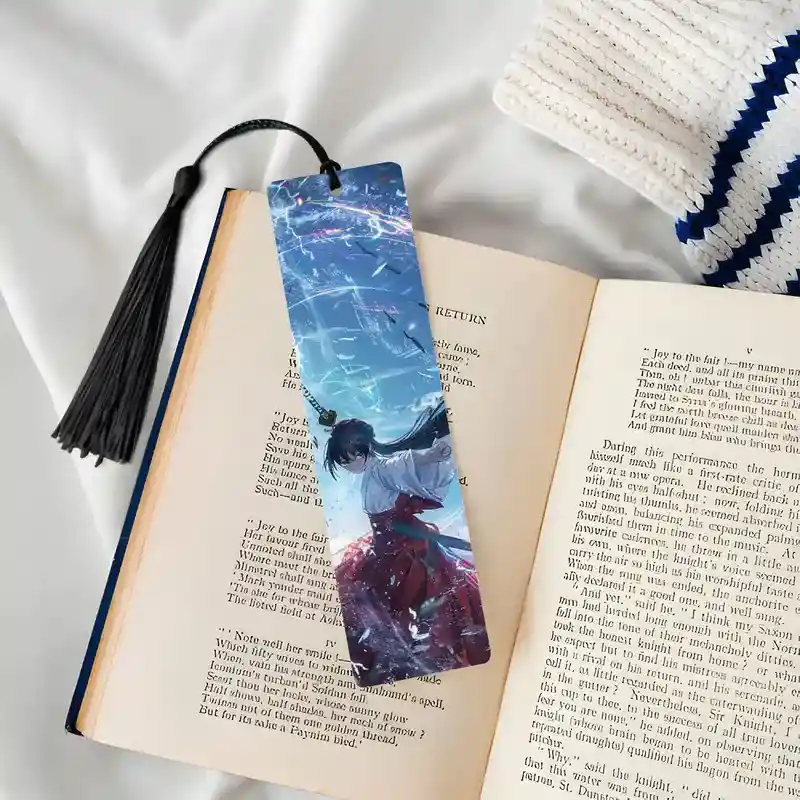
Making cloth bookmarks opens up a way to create something both functional and personal.
Unlike standard paper bookmarks, cloth versions last longer, feel better in the hands, and can be customized in ways that match individual style or specific projects.
This guide covers the essential materials, simple techniques, and small tricks that make the process smoother, helping you produce bookmarks that are not only useful but also visually appealing and durable.
It's designed for anyone looking to make meaningful keepsakes, gifts, or even items to sell.
What You Need to Make Cloth Bookmarks
Simple Version
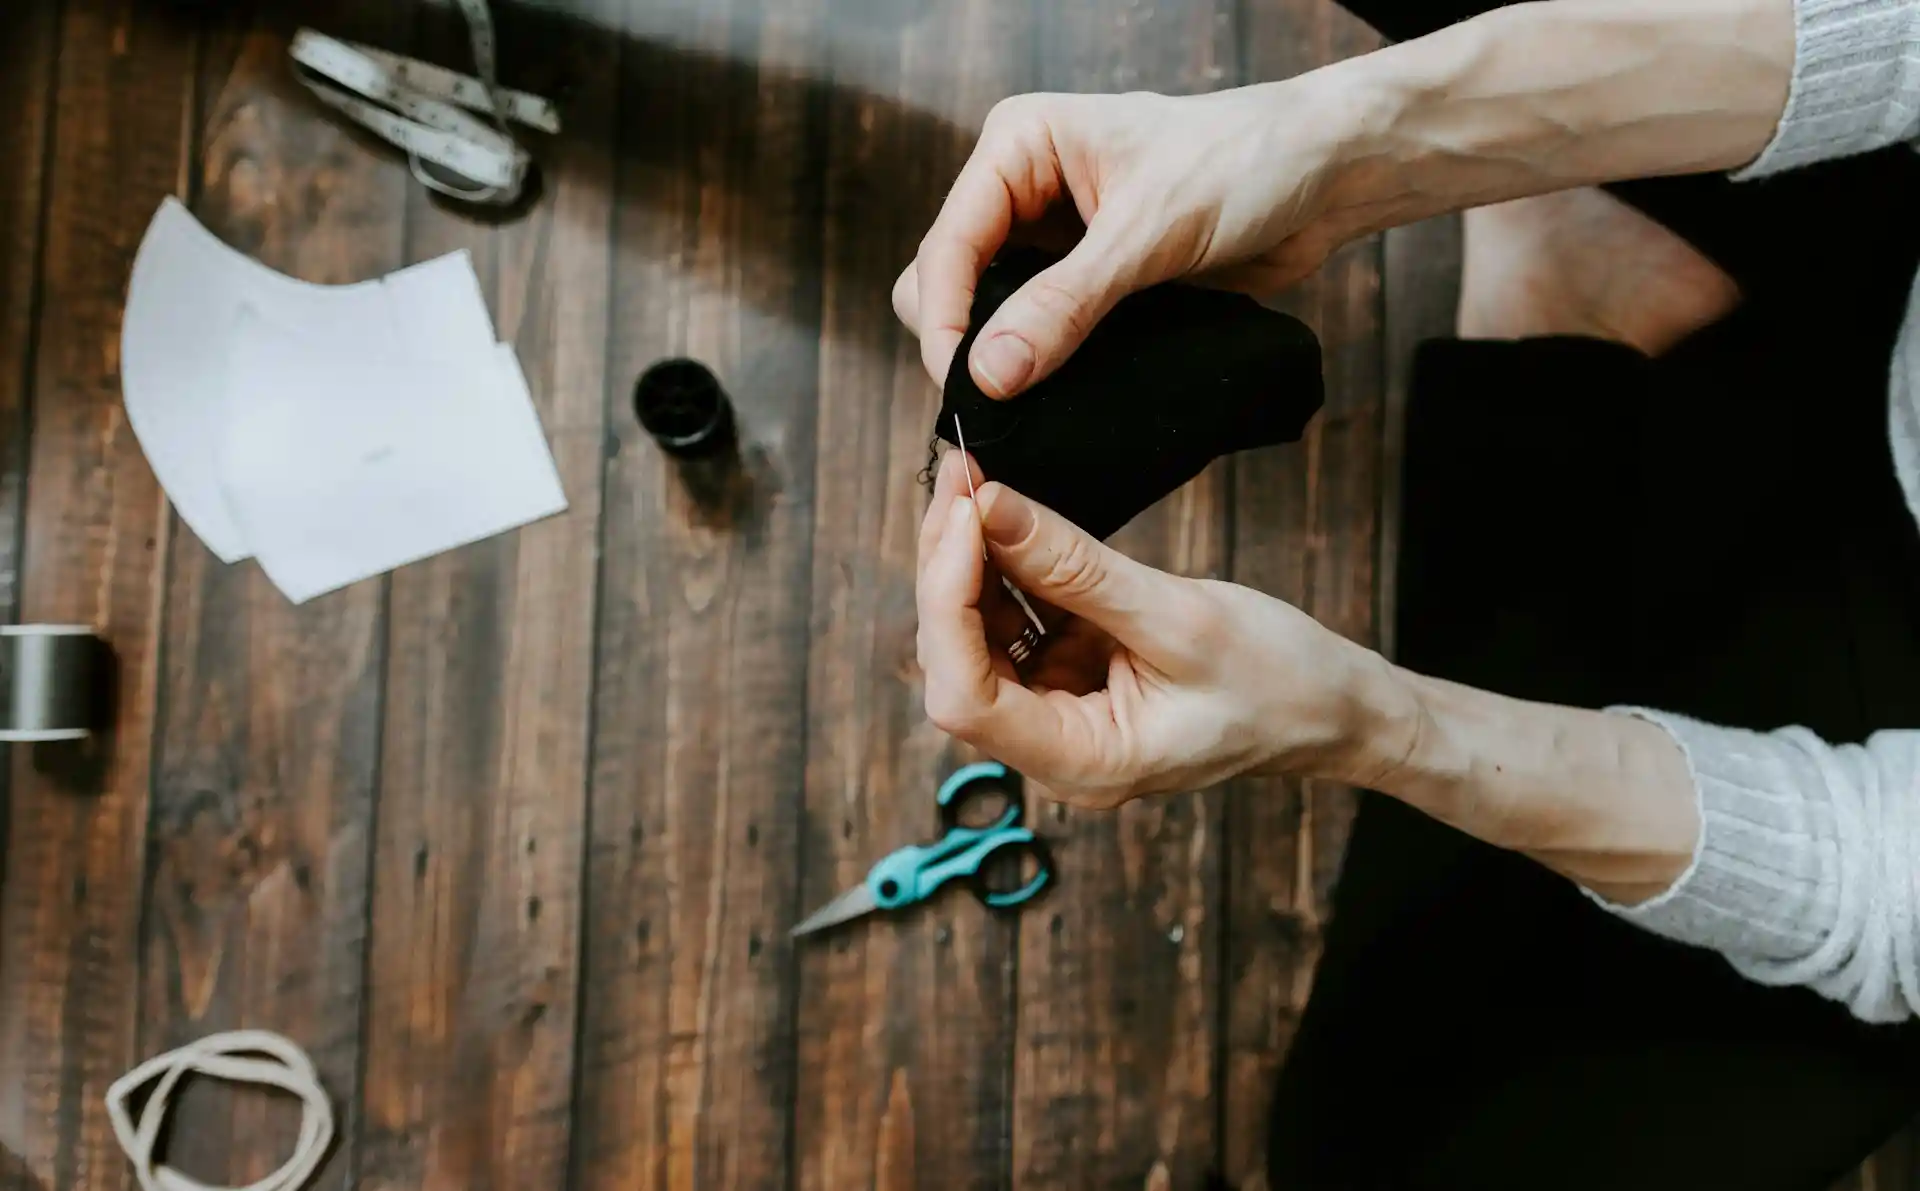
To get started with cloth bookmarks, you don't need a lot of fancy stuff. You can keep it really simple and still make something that looks great and lasts longer than paper. Here's what you'll need:
- Fabric scraps – small pieces of cotton or felt work best
- Scissors – sharp enough to cut clean edges
- Needle and thread or fabric glue – to hold everything together
- Ruler – to measure and keep your shapes even
- Optional: markers, fabric pens, or small stickers for decoration
With just these basics, you can start cutting, folding, and decorating cloth bookmarks that are strong and usable. Keeping your materials simple makes it easier to test ideas without spending too much money.
Advanced Version
If you want to make your bookmarks more professional or creative, you can use a few extra tools and materials. These additions give you more options for durability and style:
- High-quality fabric – linen, canvas, or patterned quilting cotton
- Embroidery thread – for adding personalized designs or names
- Sewing machine – speeds up stitching and makes edges neat
- Iron-on interfacing – adds stiffness so your bookmark holds shape
- Decorative trims – ribbons, lace, or fabric patches
- Optional: fabric paints or stamping tools for custom designs
These extras let you make bookmarks that feel more finished and durable. They also give you room to experiment with textures, colors, and patterns that stand out if you plan to sell or gift them.
How to Make Cloth Bookmarks?
Cut Your Fabric Precisely
Start with your fabric and trim it to the size that works for your books. Standard bookmarks are around 2 inches wide and 6 inches long, but measure against your favorite book to be sure.
Straight edges are important—uneven sides make sewing harder and corners bulky. Use sharp scissors and take a moment to square corners before moving on.
For corner bookmarks, try a triangle or square cut; this shape works well for slipping over a page without slipping out.

Add Stiffness with Interfacing or Batting
If your bookmark will be handled often, adding interfacing or a thin layer of batting makes it hold its shape.
Cut the interfacing slightly smaller than the fabric so edges don't bulge when folded. Fusible interfacing irons on easily, but if you don't have it, a thin scrap of cotton or canvas layered inside works just as well.
This step also makes embroidery or embellishments sit flat instead of sagging.
Sew the Edges Neatly
Fold the raw edges under about 1/4 inch and sew around the perimeter. A running stitch or backstitch works well if sewing by hand, but a sewing machine speeds things up.
Pay attention to corners—clip or fold them slightly so they turn neatly. Tight, even stitches prevent fraying and make the bookmark feel durable.
Keep thread tension moderate; too tight can pucker the fabric, too loose looks sloppy.
Personalize with Decorative Details
Bookmarks are a small canvas—decorations make them stand out. Options that work well:
- Embroidery: small shapes, initials, or a repeating pattern. Keep motifs simple to avoid bulk.
- Ribbons or tassels: attach at the top; use a short stitch to anchor firmly.
- Fabric paints or iron-on patches: lightweight designs maintain flexibility.
Layer decorations strategically—placing them near edges can make bookmarks easier to slip into books, while central motifs show when the bookmark is in use.
Press and Finish
A quick press with an iron smooths edges and sets decorations. Check corners and seams—sometimes a tiny adjustment can make the bookmark slide in and out more easily.
If edges feel loose, a dab of fray-preventing glue keeps everything intact. By the end, the bookmark should feel sturdy, sit flat, and be ready for daily use or gifting.
How to Make Corner Bookmarks with Simple Materials
Corner bookmarks are small, triangular pockets that slide neatly onto the corner of a page.
They stay in place better than traditional bookmarks, so they won't fall out when a book is moved around.
They are compact, easy to store, and perfect for marking pages in novels, journals, or textbooks.
These bookmarks also give you a chance to add a personal touch, making them suitable for gifts, personal use, or even small business projects.
Materials Needed
Creating a corner bookmark requires only a few basic supplies:
- Cardstock or sturdy paper
- Scissors
- Glue or tape
You can also make your bookmarks more fun and decorative with:
- Markers or colored pens
- Stickers or washi tape
- Small fabric scraps
Using simple materials ensures that making the bookmarks stays easy and enjoyable. You don’t need any special equipment, so anyone can try it.
Step-by-Step Instructions
Follow these steps to create a functional corner bookmark:
1. Cut a square from cardstock or sturdy paper. A size of 3-4 inches per side works well for most books.
2. Fold the square diagonally to form a triangle. Then fold the two corners of the triangle inward to form a small pocket that slides onto the page.
3. Secure the edges with glue or tape. Make sure the folds stay flat and the pocket holds its shape.
4. Let the bookmark dry completely before decorating or using it to prevent the pocket from coming apart.
Customization and Decoration Ideas
Once the basic bookmark is ready, you can make it uniquely yours. Some ideas include:
- Hand-drawn patterns or illustrations
- Stickers, stamps, or seasonal motifs
- Adding short quotes, initials, or small embellishments
You can also layer fabric or colored paper onto the triangle for added texture. Each bookmark can reflect your personal style, making it a perfect project for kids, friends, or small businesses.
Durability and Usage Tips
To make your bookmarks last longer and look polished:
- Use thicker paper or laminate the finished piece
- Reinforce edges with tape, glue, or a small fabric strip
- Corner bookmarks work well for gifts, personal projects, or as small handmade products for sale
Properly reinforced bookmarks will hold up well over time, keeping pages marked neatly without slipping or bending. This makes them both practical and visually appealing for any reader.
Comparing Paper vs Cloth Bookmarks
Durability
Think about how often you open and close your book. Paper bookmarks are easy to make, but they can tear or crease after just a few uses.
Cloth bookmarks can handle repeated flipping and sliding between pages without falling apart. If you want a bookmark that lasts through months of reading, cloth holds up much better.
Flexibility and Feel
Paper bookmarks are stiff and flat. They slip in easily but can sometimes bend or poke out awkwardly.
Cloth bookmarks bend and move with the page, which makes them more forgiving. The soft texture of cloth also adds a nicer feel when you grab it, especially if you like bookmarks that don't feel sharp or fragile.
Customization Options
Paper is perfect for printing, stamping, or coloring. Cloth gives you more creative freedom with embroidery, sewn patterns, or layered fabric designs.
If your goal is a bookmark that really stands out, cloth allows you to add texture and dimension that paper simply can't. The added tactile layer can make even a simple design feel premium.
Cost and Accessibility
Paper bookmarks are cheap and almost everyone has supplies on hand. Cloth takes a little more planning: you need fabric, possibly stabilizer, and maybe some thread or glue.
For personal projects, paper is quick and inexpensive. For something intended as a gift or product, investing in cloth adds a sense of quality that's noticeable immediately.
Ideal Use
Paper bookmarks are great for one-time projects, kids' crafts, or bulk giveaways. Cloth bookmarks are better for long-term use, keepsakes, or products you might sell.
The practical advantage of cloth comes from its sturdiness and the chance to create something that feels intentional and high quality.
Print on Demand Wooden Bookmark - Daily Accessories - PrintKK
Advanced Ways to Decorate Cloth Bookmarks
Embroidery Techniques
Embroidery adds delicate details that make bookmarks stand out. Choose a fabric like cotton or linen and thread such as stranded cotton or polyester.
Use flat stitches like backstitch, stem stitch, or running stitch to keep the design smooth and avoid bulk. Small floral or geometric motifs work well for bookmarks.
Stabilize the fabric with tear-away or water-soluble backing to maintain shape. After stitching, press gently and test for durability, ensuring the bookmark stays flat and functional.
Sashiko Stitching
Sashiko is a Japanese stitching method that adds texture while reinforcing edges. Stick to simple running stitches with even spacing to prevent puckering. You can apply patterns like:
- Corner motifs
- Borders around the bookmark
- Diagonal grids for visual interest
This technique works well if you want subtle detail without making the bookmark too thick. Consistent spacing is key, as uneven stitches can distort the fabric over time.
Heat Transfer Vinyl (HTV)
HTV allows you to add precise shapes and designs. Cut and weed the vinyl carefully, and choose fabrics like cotton or canvas for the best results.
Apply heat with an iron or heat press, then let it cool completely before peeling. Tips for lasting results include:
- Pre-wash fabric to remove sizing
- Apply firm, even pressure
- Avoid moving the iron too much
This method is ideal if you want bold graphics or lettering on your bookmark.
Printable Fabric Designs
Printable fabric sheets make it easy to transfer detailed designs. Use inkjet-compatible sheets or freezer paper backing.
Make sure your design fits the bookmark size and has high-contrast colors for readability. After printing, secure the design with heat-setting or a sew-in stabilizer.
Optional edge sealing can prevent fraying. This approach allows you to combine any digital pattern with the tactile feel of cloth.
Combining Techniques
For truly unique bookmarks, layering techniques works beautifully. Embroidery over printed fabric or HTV adds depth and personalization. Keep in mind:
- Plan the design to prevent bulk
- Use small motifs for balance
- Test stitch placement and adhesion before finishing
By combining methods thoughtfully, you can create bookmarks that are both decorative and durable, while remaining flat enough to slide easily between pages.
Read More:
Create Custom Bookmarks with PrintKK
PrintKK makes it easy to bring your favorite designs to life. You can upload your own artwork or illustrations directly to the platform and have them printed on high-quality bookmarks.
Whether you want to make something for yourself, gift it to friends, or sell your creations, the process is simple and fast.
The bookmarks are ready to use as soon as they arrive, so there's no need to worry about cutting or assembling.
Choose the Perfect Material
PrintKK offers wooden bookmarks, giving your designs a sturdy and elegant finish. The natural texture of wood adds character to both simple and detailed artwork.
You can experiment with different shapes or sizes, and the wooden base makes your bookmarks feel more premium than standard paper or cloth.
Using a wooden bookmark also ensures it lasts longer when placed in your favorite books.
Make Designs Quickly with AI
For creators who want to speed up the process, PrintKK includes an AI Image tool. This tool can help you optimize retro or vintage designs and adjust colors.
Even beginners can create professional-looking bookmarks quickly. The AI suggestions make it easy to experiment with style, so your bookmarks look polished and unique every time.
Sell Your Custom Bookmarks
Once your design is ready, PrintKK integrates easily with Etsy and other platforms. This means you can:
- Upload multiple designs at once
- Sync products directly to your online shop
- Reach buyers who love handmade and custom bookmarks
This setup makes it straightforward to turn a hobby into a small business. You can focus on creating beautiful designs while PrintKK handles printing and quality.
Tips for Getting the Best Results
When using PrintKK, consider a few practical steps:
- Choose high-contrast images to make details stand out on wood
- Keep small text and fine lines slightly larger for clarity
- Test a small batch before ordering in bulk
Following these tips ensures your bookmarks look sharp, professional, and ready to impress anyone who uses them.
Expert Tips
Learning how to make cloth bookmarks gives you a chance to create something practical and personal. You can start with simple supplies or try more advanced tools.
By following this guide, you can confidently craft bookmarks that last and feel personal. Keep experimenting with colors, fabrics, and designs.
You have everything you need to create functional and attractive cloth bookmarks.
FAQs
What is the best material for homemade bookmarks?
Felt and cotton are reliable choices because they hold up well over time and are easy to decorate. Thin fabrics or paper can work, but they may wear or bend after frequent use.
What is the best thickness for bookmarks?
Aim for something sturdy yet flexible. Two layers of felt or a medium-weight cardstock usually slide into pages without stretching them, while still giving the bookmark a solid feel.
Can I sell handmade bookmarks?
Handmade bookmarks can be sold, especially when designs are original or customized. Consider the durability and presentation, since people often value bookmarks that feel thoughtful and last through regular reading.


 Global Shipping